Need to capture your screen on a How to Screenshot on Mac
but unsure how? Whether you’re saving an error message, sharing a funny chat, or documenting work, knowing how to screenshot on Mac is essential. The good news? It’s fast, built-in, and doesn’t require third-party apps. This guide walks you through every method—from full-screen grabs to precise selections—so you can screenshot like a pro.
How to Screenshot on Mac? Common Use Cases
Screenshots are more than just images—they’re quick communication tools. You might use them to:
- Save important information from a website
- Report a software bug with visual proof
- Share a design or layout with a colleague
- Capture a moment in a video call or online meeting
- Create tutorials or training materials
Whatever your reason, macOS offers multiple ways to take screenshots, each suited to different needs.
Method 1: Capture the Entire Screen
The simplest way to screenshot on Mac is capturing the full display. This method saves everything visible on your screen at that moment.
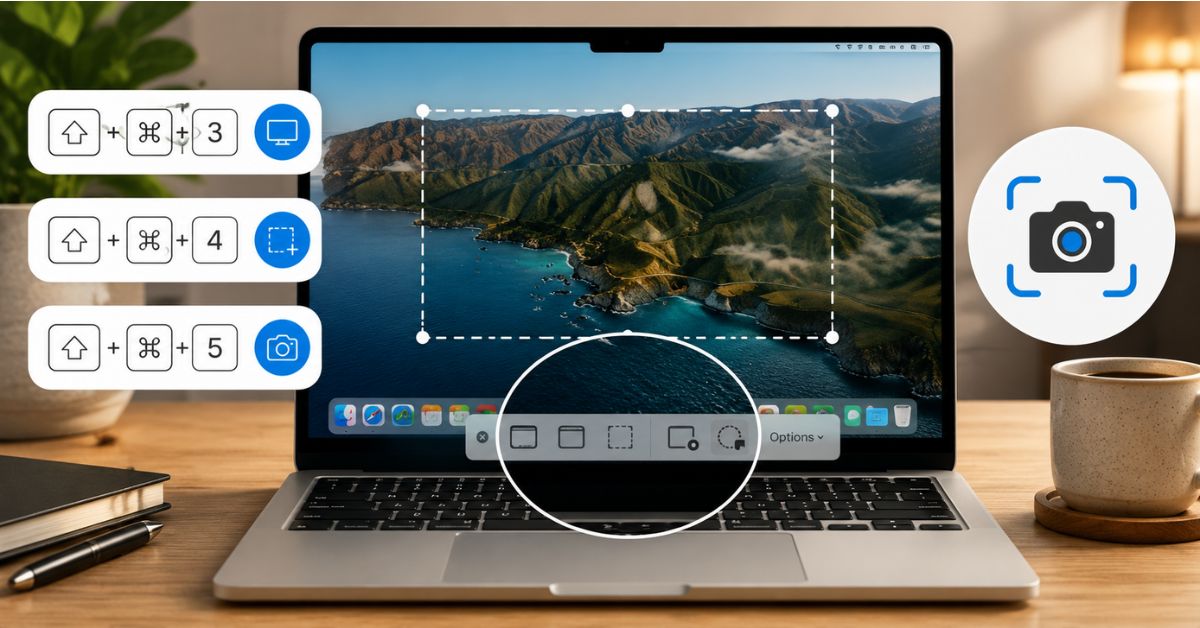
Press Command + Shift + 3 simultaneously. You’ll hear a camera shutter sound, and the screenshot will appear as a thumbnail in the bottom-right corner of your screen. Click the thumbnail to edit or drag it to save immediately.
By default, the image saves to your desktop as a PNG file named “Screen Shot” followed by the date and time. You can change the save location in System Settings if needed.
Method 2: Select a Specific Area
Want to capture only part of your screen? Use the selection tool to draw a custom frame around the content you need.
Press Command + Shift + 4. Your cursor will turn into a crosshair. Click and drag to select the area you want to capture. Release the mouse or trackpad to take the shot.
Tip: Hold the Spacebar while dragging to move the entire selection area. Press Escape (Esc) to cancel the action.
Method 3: Capture a Specific Window
Need just one window—like a browser tab or document—without extra clutter? This method isolates a single app window.
Press Command + Shift + 4, then press the Spacebar. The cursor becomes a camera icon. Click on any open window to capture it.
The screenshot will include a subtle drop shadow around the window, giving it a clean, professional look. Perfect for presentations or documentation.
Method 4: Use Screenshot Toolbar (macOS Mojave and Later)
For more control, use the built-in Screenshot toolbar introduced in macOS Mojave. It offers options beyond keyboard shortcuts.
Press Command + Shift + 5 to open the toolbar at the bottom of your screen. From here, you can:
- Capture the entire screen
- Capture a selected portion
- Record the screen (video)
- Choose where to save (Desktop, Documents, Clipboard, etc.)
- Set a timer delay (5 or 10 seconds)
- Show or hide the cursor in the screenshot
This toolbar is ideal for users who want flexibility without memorizing multiple shortcuts.
Screenshot File Formats and Settings
By default, macOS saves screenshots in PNG format—great for quality and transparency. However, you can change the format to JPEG, TIFF, or PDF using Terminal commands if needed.
To change the save location, go to System Settings > Desktop & Dock > Screenshots (on macOS Ventura and later). Choose from Desktop, Documents, Clipboard, Mail, Messages, or a custom folder.
You can also disable the thumbnail preview by adding defaults write com.apple.screencapture show-thumbnail -bool false in Terminal, though most users find the preview helpful for quick edits.
Editing Screenshots on Mac
Once you take a screenshot, the thumbnail appears for a few seconds. Click it to open the Markup editor, where you can:
- Add text, arrows, or shapes
- Highlight or blur sensitive info
- Crop or rotate the image
- Sign documents with your finger or Apple Pencil
These tools make it easy to annotate and share screenshots without leaving your Mac.
Read More : How to Screenshot in Windows 2026
Key Takeaways
- Use Command + Shift + 3 to capture the entire screen.
- Use Command + Shift + 4 to select a custom area.
- Press Spacebar after Command + Shift + 4 to capture a specific window.
- Open the Screenshot toolbar with Command + Shift + 5 for advanced options.
- Edit screenshots instantly using the Markup tool.
- Change save location and format in System Settings or Terminal.
FAQ: How to Screenshot on Mac
Where do screenshots save on Mac?
By default, screenshots save to your Desktop as PNG files. You can change the location in System Settings under Desktop & Dock > Screenshots.
Can I take a screenshot without the sound?
Yes. The camera shutter sound can be muted by turning off system sounds or using the Screenshot toolbar with a timer. Alternatively, disable the sound via Terminal with defaults write com.apple.systemsound 'com.apple.sound.uiaudio.enabled' -int 0.
How do I screenshot on a MacBook with Touch Bar?
If your MacBook has a Touch Bar, you can still use all standard keyboard shortcuts. Additionally, the Screenshot toolbar (Command + Shift + 5) may appear on the Touch Bar for quick access to capture options.
Can I take a screenshot of a menu that disappears?
Yes. Use the timer in the Screenshot toolbar (Command + Shift + 5). Set a 5 or 10-second delay, then open the menu. The screenshot will capture it after the timer ends.
Mastering how to screenshot on Mac saves time and improves productivity. With just a few keystrokes, you can capture, edit, and share exactly what you need—no extra software required. Whether you’re a student, designer, or remote worker, these tools are built to make your workflow smoother.